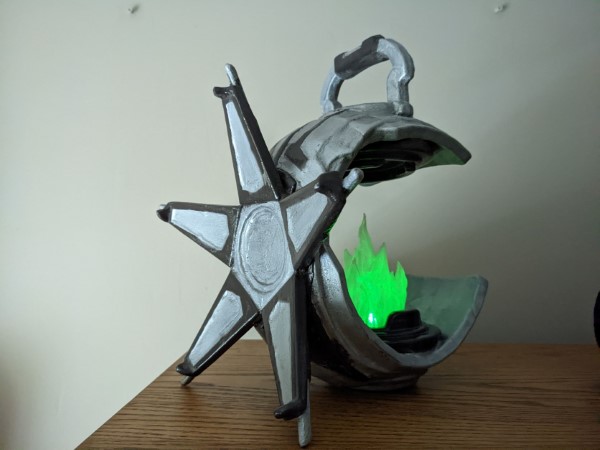
Outer Wilds Echoes of the Eye Artifact
The artifact from Outer Wilds Echoes of the Eye. 3D printed with an Arduino powered flame that can be turned on using a flashlight and turned off by blowing it out.
This article is a work in progress. I am going to add a simpler schematic for use as a static prop or night light, and generate a better schematic image.
Created and shared as per the Mobius Digital Games Fan Content Policy
This work is unofficial Fan Content created under permission from the Mobius Digital Fan Content Policy. It includes materials which are the property of Mobius Digital and it is neither approved nor endorsed by Mobius Digital.
The artifact was extracted from game files and modified to be printable by me.
Time Required: A few hours (plus a couple days to print)
Difficulty: Intermediate
Cost: $20 - $30
Materials
- Black 1.75mm PLA
- Clear or glow in the dark 1.75mm PLA
- Silver spray paint
- Anodized bronze spray paint
- Sandable primer paint
- Wood filler
- Painter's tape
- CA glue and activator
- Hot glue
- 4 6x2mm neodymium magnets
- RGB LED
- Arduino nano
- LDR
- 2k, 10k and 560 resistors
- 9V battery and connector
- Analog microphone (HiLetgo MAX4466)
Tools
- 3D printer
- Soldering iron
- Hot glue gun
Build instructions
-
Print the STL files (everything except for artifact.stl). I printed them in PLA at 20% infill (Lightning pattern) with a 0.28mm layer height. Any color filament fill work for the artifact pieces, but use a clear (or glow in the dark) filament for the flame. You may need to use supports and rotate/split them to fit in your print bed.
-
Line up and glue the artifact pieces together using CA glue (everything except the flame and flame holder). I recommend treating the artifact body and arms as two separate pieces - it allows for easier sanding and painting.
-
Use wood filler to fill in the gaps and sand it with 80 grit sand paper.
-
Apply a coat or two of sandable primer.
-
Sand with 400 grit sand paper.
-
Apply a coat of silver spray paint.
-
Once dry, mask off any true silver areas with painter's tape, then spray the unmasked sections with anodized bronze. I used the video game model as a reference and only painted the most prominent areas - adjust based on your skill (or just keep it silver).
-
Once dry, spray on a clear coat to protect it.
-
Glue the artifact body and arms together using CA glue (you may need to sand the mating faces to remove paint).
-
Embed small neodymium magnets (6x2mm) into the small holes on the flame holder and flame so they can be attached. Secure in place with hot glue after you've verified they are facing the right direction.
-
Wire the electronics together using the attached schematic.
-
Upload the sketch to the arduino and verify everything is working.
-
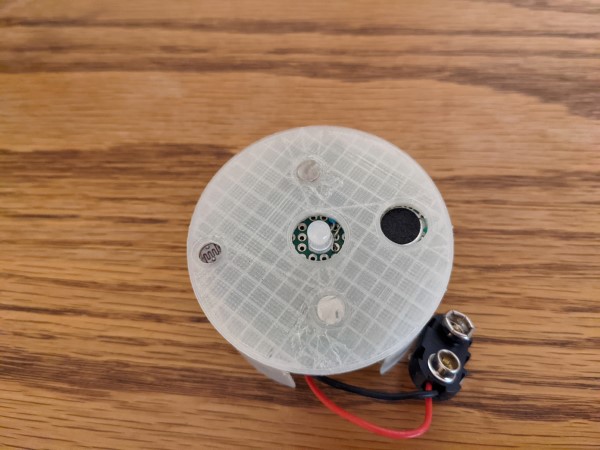
Using hot glue, attach the electronics to the holes in the flame holder, as shown:
-
Plug in the battery and tuck everything into the hole in the artifact.
-
Attach the flame to the flame holder and shine a bright light on it, then bring into the darkness - the flame should turn on Blow on the flame to turn it off.