5 - Fire
Knowing how to make fire can help you stay warm, purify water, and cook food.
This chapter is for informational purposes only and does not replace professional advice; use at your own risk and ensure compliance with local laws.
Be prepared
Gear
Necessities:
- Firestarter (lighter, waterproof matches, or fire steel)
- You can carry a credit-card-sized Fresnel lens in your wallet or phone case as an emergency backup firestarter.
Optional:
- Tinder (charcloth, dryer lint, cotton balls soaked in petroleum jelly, or commercial fire starters)
Knowledge and skills
Start by learning how to do the following:
- Build a fire using multiple fire starters (matches, lighters, fire steel)
- Gather and prepare tinder, kindling, and fuel
- Maintain a fire
- Extinguish a fire
- Build a fire in wet conditions
Once you have mastered these skills, you should learn how to do the following:
- Protect a fire from wind and rain
- Construct and use a bow drill
- Make charcoal
Preparing a fire site
You should prepare the fire site before attempting to start a fire. Choose a flat, dry area protected from the wind that is close to your shelter and your fuel supply. If you are sheltered near a large rock, cliff, or embankment, lay out your fire so that it is on the opposite side of your shelter from the rock face. This will reflect more heat onto your shelter.
Clear the ground of flammable material and, if possible, line the area with dry rocks, dirt, or sand. Do not construct a fire under a tree with low branches or over a root system or peat. Avoid areas with dry grass, leaves, or conifer needles nearby. In snowy environments, lay down logs to prevent the fire from touching the snow. Gather all materials before trying to start the fire.
You should also be aware of local laws and regulations, as some areas may not allow fires.
Gathering materials
You need three types of materials to start and maintain a fire: tinder, kindling, and fuel. Tinder is a dry, fine material that catches fire easily and is used to start a fire. Kindling consists of small sticks and twigs that burn easily and are used to build up the fire after lighting the tinder. Finally, fuel is used to sustain the fire and consists of larger sticks or logs. To make a fire, find about a handful of tinder, two handfuls of kindling, and a pile of fuel-double the amount you estimate you'll need.
Finding dry wood can be difficult, but look for dead branches on trees, fallen branches that aren't fully touching the ground, and sticks that break cleanly when snapped. You can dry out damp tinder by placing it near your body or in your sleeping bag, and you can dry out fuel by placing it near the fire.
- Tinder
- Shredded inner bark (birch, cedar, chestnut, red elm)
- Fine wood scrapings or shavings
- Fatwood: resin-rich wood from pine trees, typically found at the base of dead branches
- Dry grass, leaves, or pine needles
- Dry powdered sap from pine trees
- Crushed fibers from dead plants
- Seed down (cattail, milkweed, thistle)
- Feather sticks (wood shavings attached to a stick)
- Commercial fire starters
- Cotton balls (preferably soaked in petroleum jelly)
- Lint
- Paper
- Tinder fungus or chaga
- Dry rotted wood (found in dead standing trees and downed logs)
- Kindling
- Sticks and twigs (pencil to finger thickness)
- Thinly split wood
- Plastics, such as straws or spoons (only in an emergency; these release fumes that you shouldn't breathe in)
- Wood soaked in a flammable liquid such as bug spray or hand sanitizer (use caution)
- Fuel
- Prefer fallen wood that you can break by hand over wood that requires cutting
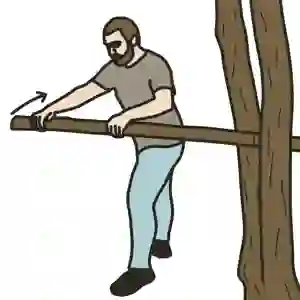
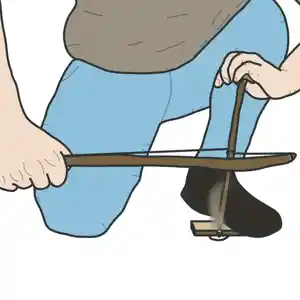
- To break a larger piece of wood, insert it between two live trees at the point you want to break it and push it to the side until it snaps, as seen below.
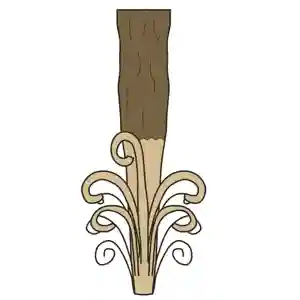
Feather sticks
A feather stick can be used as tinder and kindling to help start a fire when other tinder is hard to find.
To make a feather stick:
- Find a straight, thick, dry stick.
- Starting near the top, use a knife to shave a long, thin wood curl away from the stick, but try not to cut it completely off.
- Repeat this process, but cut along the ridge created by your last cut. Be careful not to cut off the previous curls.
- Gather any curls that fell off. You can still use them as tinder.
- To start a fire, follow the next section using the feather stick as your tinder bundle.
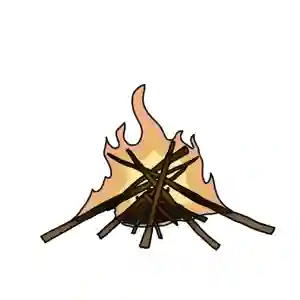
Starting a fire
Once you have a site prepared and a sufficient supply of tinder, kindling, and fuel, you are ready to start the fire. As you build up the fire, be careful to always leave a section with open flame exposed so as not to smother it. Also, avoid adding damp or green wood until your fire is hot and you have an established bed of coals.
Here are the steps you can follow to get it going:
- Place the tinder into a small bundle or nest on the ground.
- Lean a few pieces of kindling against the tinder in a teepee shape.
- Light the tinder.
- Carefully add kindling to the fire and gently blow into the base to encourage growth. When blowing into a fire, be gentle and take breaths away from the smoke.
- Once your fire is steady, add fuel while maintaining a teepee structure.
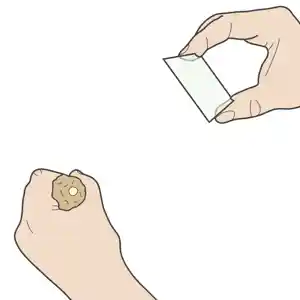
Nursing an ember
An ember is a small piece of tinder that is smoldering but has not formed a flame. Once you have an ember, gently blow into it and feed it more tinder until a flame appears. Sometimes, it is easier to hold the tinder containing the ember and cup your hands closer together to find the right balance of oxygen, fuel, and heat.
Lighter
A reliable lighter is the easiest way to start a fire. Use the striker to produce a flame and use your hand to shield it against any wind. Put the flame to the tinder to ignite it, and then shut off the lighter. When lighting tinder at ground level, hold the lighter horizontally and twisted so that the flame is above the striker wheel and your fingers. If it takes you more than a couple of seconds to ignite the tinder, then it is not fine or dry enough.
Some lighters require that you add fuel before use, so be sure to try out your lighter before you need it. The fuel should last a long time-even years with moderate use. If your lighter is out of fuel, you can still use the striker wheel to generate sparks to catch very fine tinder.
A lighter generally does not work when wet, but you can dry it quickly by gently rubbing the striker wheel against your clothes in the opposite direction that you would strike it and forcefully blowing into the striker area.
You can also remove the child safety device from the striker wheel to more easily dry the lighter or use it in the cold. To do so, point it away from your eyes (the safety is spring-loaded) and use a knife or multi-tool to pry it off. Do this at your own risk.
There are also electric/arc lighters available, but they are less reliable and require a charge. They can be used in a similar fashion to regular lighters but typically require smaller and finer tinder.
Matches
Matches typically require a special striking surface to light, though strike-anywhere matches exist and can be lit using a rough rock. Regular matches will not work when wet or in wind, but waterproof and stormproof varieties are available.
To light a fire with matches, light the match and use your hand to shield it against any wind. Hold the lit match so that the head is slightly below the level of the matchstick to allow the flame to burn longer. Put the flame to the tinder to ignite it and carefully drop the matchstick into the flame.
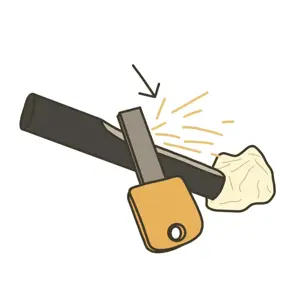
Fire steel
A fire steel or ferrocerium rod is durable and works in all weather conditions. You can scrape it quickly with a sharp edge, such as the back of your knife, a dedicated scraper, or even a sharp piece of quartz or flint. You should avoid using the blade of your knife to prevent dulling it. If you are having trouble keeping the tinder in place while striking, pin the tinder between the fire steel and the ground and scrape toward the tinder. Some people also find it easier to keep the scraping edge stationary and pull the fire steel up/away from the tinder to produce sparks.
Some fire steels come with a magnesium block, which you can scrape into the tinder before striking to help catch a spark. Create a small pile of shavings, about the size of a pebble, before trying to ignite it.
Camp stove
Most camp stoves require another ignition device, such as a lighter, but some may have a built-in piezoelectric igniter. Always place the stove on a flat, stable surface that will not catch fire (such as a rock). Be sure to read the manufacturer's instructions before using it.
To use a fuel canister stove:
- Ensure the valve is turned off (generally, turn clockwise).
- Screw the stove head onto the canister.
- Place the stove on a flat surface and ensure it is stable.
- Expand the pot holders on the head if needed.
- Open the valve slightly (turn counterclockwise).
- Ignite the gas and adjust the valve as needed.
- Once you're done, turn the valve completely off (turn clockwise). Wait for it to cool down before detaching the canister and storing it.
To use an alcohol or solid fuel stove:
- Place the stove on a flat surface and ensure it is stable.
- Fill the stove with fuel.
- Ignite the fuel.
- Once you're done, gently place the lid on the stove (don't tighten it). Wait for it to cool before tightening the lid and storing it. If using a solid fuel stove, you may need to wait for it to burn out.
Magnifying glass/lens
Using a lens, focus sunlight into a small point on the tinder. As the tinder starts to smoke, gently blow into it and adjust the lens closer to maintain a small point. A magnifying glass, prescription glasses, a Fresnel lens, or even a clear bottle filled with water can work. This may take a while, and direct sunlight is required.
Flint and steel
Strike a flint rock with a carbon steel tool to create sparks and ignite very dry and delicate tinder. Stainless steel-and therefore most pocket knives-will not work. If you find yourself here, it may be best to focus on insulation and shelter to stay warm.
Drills
You can create friction by spinning a stick like a drill on a wooden base (fireboard). A hand drill is simple to construct, as it's just the drill stick, fireboard, and your hands. A bow drill is more complicated to build but is easier to use to create an ember. Both of these methods are difficult to master and require a lot of practice. If you find yourself here, it may be best to focus on insulation and shelter to stay warm.
To create a bow drill:
- Find a small, flat stone or piece of hardwood with a small depression near the center to create the socket.
- Create the drill by finding a straight, dry stick about 10-12 inches (25-30 cm) long and ¾ inch (2 cm) in diameter.
- Find a flat, dry piece of softwood for the fireboard. Yucca, tamarack, aspen, balsam fir, basswood, poplar, cypress, cottonwood, alder, red cedar, and willow are preferred. Avoid resinous woods like pine.
- Carve a slight depression about ½ to ¾ inch (1-2 cm) from the edge of the fireboard.
- On the underside of the fireboard, make a V-shaped cut from the board's edge to the depression.
- Find a curved stick that can be used for the bow. It should be about 12-14 inches (30-35 cm) long and ½ inch (1 cm) in diameter.
- Attach a cord or shoelace to both ends of the bow.
- Find the fire pan - a flat piece of bark or wood to catch the ember.
- Wrap the drill into the bowstring so that it can roll as it moves along the string.
- Place the fireboard on top of the fire pan so the V-shaped notch is touching it.
- Place the drill (attached to the bow) into the depression in the fireboard.
- Place the socket onto the top end of the drill and apply downward pressure with your non-dominant hand.
- Place your foot on the fireboard (on the same side as your non-dominant hand) and rest the hand holding the socket on your knee.
- With your dominant hand, move the bow side to side to cause the drill to spin. Be sure to use the full length of the bowstring. Keep a steady, fast pace.
- You will start to see smoke after a while. Keep going until you are sure an ember has been created.
- The ember should be transferred onto the fire pan (it may already be there) and moved to a tinder bundle, where you can nurse it into a fire. If you have charcloth, put it in the fire pan.
If you are using a hand drill, follow the same steps as the bow drill, except don't create the bow and socket. Instead, roll the drill between your palms until you reach the bottom, then start again from the top. Use a longer stick as the drill to provide more room for your hands to spin it before resetting.
Extinguishing a fire
You should always have a plan to quickly extinguish your fire in case it begins to spread. Thoroughly extinguish your fire by dousing it with water and/or covering it with dirt. Make sure no embers remain that could reignite or cause a wildfire. If you are on a beach, do not cover the fire with sand; it can insulate the heat and cause burns. Don't leave an active fire unattended.
Increasing warmth
To maximize the heat from your fire, you can add more dry fuel, build a fire reflector, heat up rocks, or increase the insulation of your clothing and shelter.
Types of wood
Hardwoods (oak, maple, ash, beech, etc.) burn slow and hot, while softwoods (pine, fir, spruce, cedar, etc.) burn fast and cool (but still very hot). Once you have a hot fire going, start adding hardwoods to make it last longer and burn hotter.
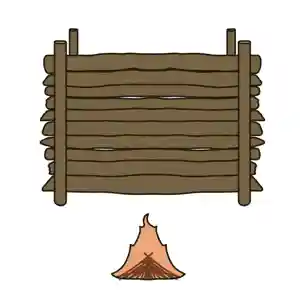
Fire reflector
A fire reflector is a wall built behind the fire to reflect heat toward you and protect the fire from wind. Use rocks, logs (preferably green or waterlogged), or snow to create a barrier.
Building a second reflector behind you will help reflect even more heat. You can also use an emergency space blanket or umbrella for this reflector.
Heating rocks
You can also heat rocks near the fire and place them in your shelter or sleeping area, or bury them under your bedding. To avoid burns or fires, don't let the rocks get too hot; they should be warm to the touch. Be sure to check how hot the stones are before touching them. Do not use rocks found near water sources, as they can explode in a fire. Alternatively, you can heat water and place it in a container or bottle to keep warm.
Craft: charcoal
Charcoal is made by preventing wood from completely burning. It can be used for filtering water, medicine, and as fuel for fires. You can grind charcoal into powder by placing it in a container and crushing it with a stick or rock.
Resources
- Wood
- Water or dirt
Instructions
- Burn a fire down to coals.
- Douse the fire with water or dirt to quickly extinguish it.
- Wait for the coals to cool; some charcoal should be among the ashes. Charcoal is very light and entirely black.